
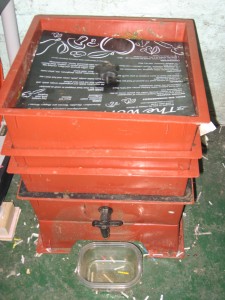
Our Worm Factory(TM) breaks down our food scraps fast. These typically run $80 or more. Fortunately a friend gave it to us, free!
Valentines day was coming up, so I decided to get my girlfriend a worm bin to compost her kitchen scraps in her apartment–I’m a true romantic. She had been jealous of The Worm Factory given to me and Troy by a friend for a whole year now. The Worm Factory works great; it makes finished worm castings in about a month; a pound of worms can eat about a pound of food a day; it produces a nutrient rich “tea” for fertilizing indoor or outdoor plants; the compost itself is more broken down than outdoor composting and closer to soil humus; and best of all it takes up minimal space and I can compost all winter long.
I have found that the stacked style of worm composting is far superior to the single bin method. With a single bin one adds compost to one side of the bin and then the other. This method requires quite a bit digging, worm separating and care in maintaining the proper moisture levels. Its more work.
With the stacked container method as one container fills up, another is added on top. As the worms finish eating what is in the first container, they migrate up to the second and so on. Depending on worm population, which is regulated by the amount of steady feeding, the first container will have finished compost in about a month to be used in the garden or stored in another container for the winter. Excess water drops through the containers and collects in a catch on the bottom where it can be drained off with a tap.
The only problem is: these containers are expensive! The relatively economical Worm Factory will run you about $80 or more. On Google shopping I’ve seen bins as low as $43 and as high as $175.
After the ceiling sprung a leak at my office, I noticed how nicely the 5 gallon “Homer” buckets from home depot stacked leaving a cavity several inches tall between stacked buckets. “Perfect for worms!” I thought. Below, you will find instructions on how to make a functional, somewhat attractive worm bin for less than $15.
What you will need:
- 4 (more if you want to stack higher than three containers) 5 gallon Homer buckets from HomeDepot – $2.34 each
- 1 Homer lid – $1
- An inexpensive valve/faucet – about $5
Optional additions:
- A paper shredder – about $30 at Target
- A spray bottle – recycle one from a non-toxic product or $1 a the dollar store
- A kitchen compost caddy – about $15 at Marshals
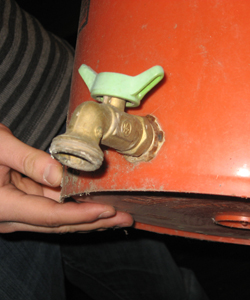
Step 1:Install a faucet to the bottom of one of the buckets. Drill a hole as low as you can on the bucket with just enough room to tighten the nut on the back of the fixture. My largest drill bit wasn’t quite large enough, so I used a pocket knife to widdle the whole larger (be careful). Don’t worry about the faucet scraping on the ground, you will want to lift up the bucket with a brick or cinderblock later.
Side note: I first made this faucet bucket for an experiment with bokashi composting. It seemed like a good idea for composting in an apartment. Similar to worms you layer food and newspaper, but instead of worms a fungal (bokashi) infused wheat bran is used to “pickle” the compost. After a full container “pickles” for a month, it can be buried and breaks down quickly. It is supposed to not smell too strongly, but sweet and earthly. However, sweet smells were not easily accomplished and housemates kicked the bucket to the back porch, where it froze or cooked and was generally ignored. In addition to back porch exile, burying the buckets and digging them back up proved a pain in a small yard and impossible in the winter– several buckets were left “pickling” and frozen and in a couple months food was going into the trash again.
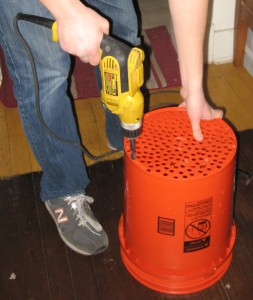
Step 2: Drill holes in the bottoms of the other 3 buckets starting from the center and moving out until thoroughly holey. I used a drill bit slightly smaller than a dime. Smaller holes may be better for retaining worm castings when lifting the stacked layers, but would take more time.
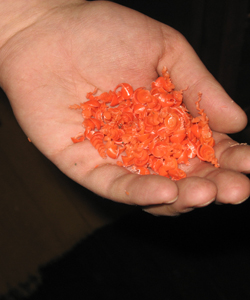
Do your drilling someplace you don’t mind getting messy. By the end you will have hundreds of curly orange plastic bits to sweep up.
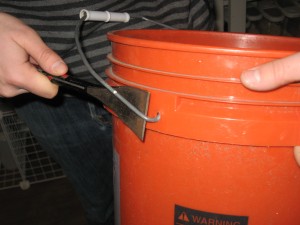
Step 3: Pry off the metal handles on all of the buckets with a pry bar. A screwdriver and a block for leverage might work too. For some of the buckets I used the pry bar to open up the crimp in the wire and then wrestled it out of its hole by hand. Keep the least mangled handle for later.
You should now have at least 3 buckets with lots of holes and 1 bucket with a faucet and no holes.
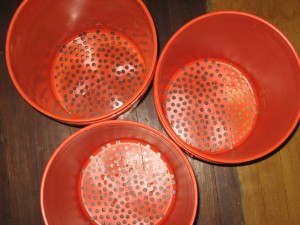
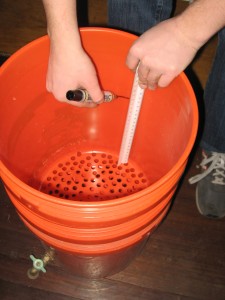
Step 4:Mark a line in the 3 holey buckets at 8 inches on two sides with a permanent marker. When filling with compost, do not fill past the line! Eight inches is the same proportion (just under 1 to 3) as the minimum cavity left in the Worm Factory. The compost will shrink and compact as the worms eat it, but we want to keep it from compacting too much under the weight of buckets on top of it.
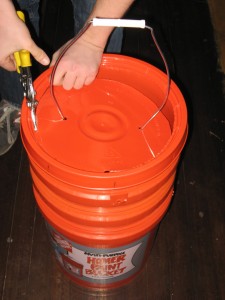
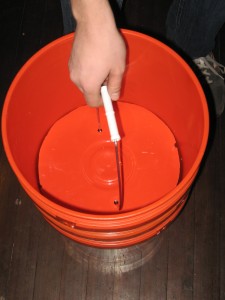
Step 5:To make the lid, drill two holes just large enough to fit the crimped ends of the handle in an inch on either side of the center ring. Bend the ends of the handle into the holes, it should stand on end.
Step 6: Drill two holes on the outer edge on the top of the lid large enough to fit tin-snips (a good pair of scissors might work) and cut out the top of the lid. You should now have a lid the slides down most of the way into the bucket. This lid will rest on top of the food, allow for some air flow, but keep the compost from drying out.
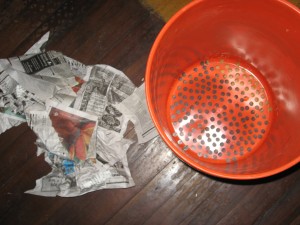
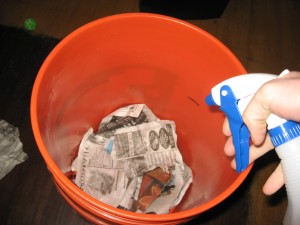
Step 7:Add enough crumpled newspaper to cover the bottom of one of the holey buckets and wet down. This is a one time process and is meant to keep the worms from falling into the “tea” catching bucket while the worms are getting established in their new home.
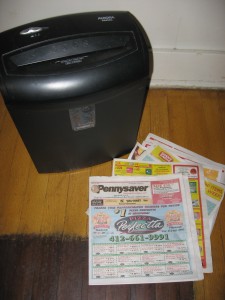
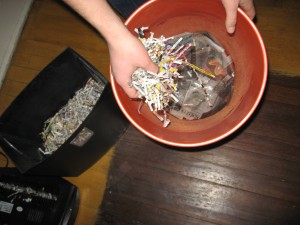
Step 8:Add a layer of shredded news paper. I use a paper shredder. It saves time, makes superior shredded material that the worms can break up easily, and you can store the shredded paper in the shredder’s bin. Here is what newspaper does:
- It adds aeration, keeping the bin aerobic (not anaerobic, which would be bad for the worms, compost and is smelly)
- It provides needed carbon to nitrogen rich food stuffs
- It absorbs moisture from decomposing food
- It covers the newly added food stuffs and keeps bugs out
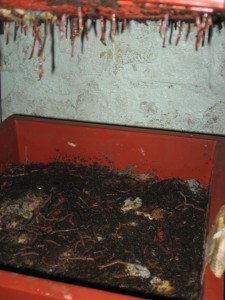
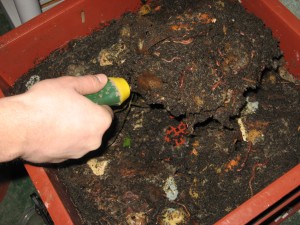
Step 9:Add worms and some soil. We are lucky enough to have a bumper crop of red wigglers. We scooped out a third of the bottom container and added a little soil to the new bin. If you don’t have access to red wigglers you can order them from Uncle Jim’s Worm Farm. Don’t worry about getting too many; worms can double in population in 2 to 4 months if they have enough food. Again, the ration of worm weight to daily food consumption is 1 to 1. One pound of worms can eat a pound of food a day. Worms also increase their sexual activity if they are warmer (65 to 77 degrees), but don’t get them too warm or the adult worms will start to dwindle.
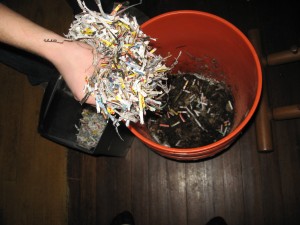
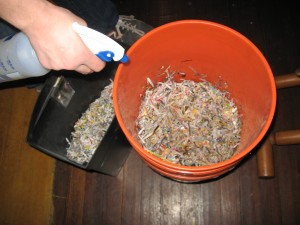
Step 10:Add some more shredded newspaper and wet down.
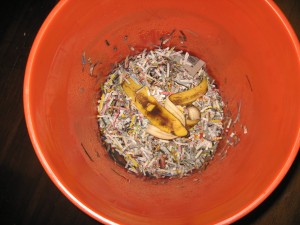
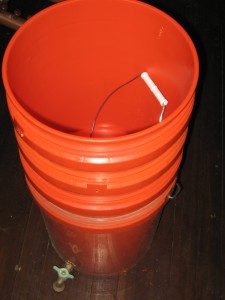
Step 11:Start composting! Cover every layer of food thickly with a layer of shredded newspaper. With enough worms and shredded newspaper it should smell earthy, not bad. Feed the compost regularly. Do not fast and feast your worms or the population will always be trying to catch up and not be able to take care of your waste.
Remember to drain the “tea” periodically; you will need to tilt the contraption forward a bit and may want to keep the whole thing on a couple bricks, a cinder block or a shelf.
Some advise against giving the worms high quantities of “harsh foods” like high acids such as citrus and onion. Onion peel should be fine as it has little acid, but avoid raw pepper. Although experts are divided about weather or not to feed worms simple carbohydrates, we have found that worms will flock to pasta, and stale bread as well as used coffee grounds, tea, and horse manure. Let the worms decide what they like!
-Asa